Welcome to your ultimate guide on choosing the perfect colour to paint your concrete fence posts! Whether you’re looking to refresh your outdoor space or completely transform its look, selecting the right paint colour can make a significant difference. In this post, we’ll explore how a simple coat of paint can elevate your garden or yard, enhance curb appeal, and even extend the life of your fence posts. We’ll cover everything from trendy shades to timeless neutrals, practical considerations based on your environment, and step-by-step tips for getting the job done right. Let’s dive in and help you choose the ideal colour to bring your outdoor space to life.
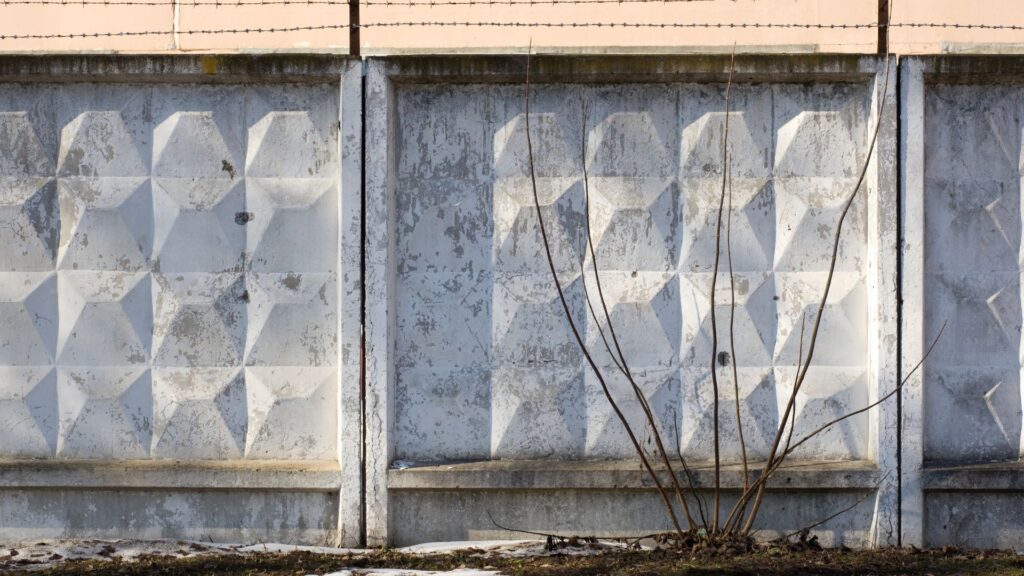
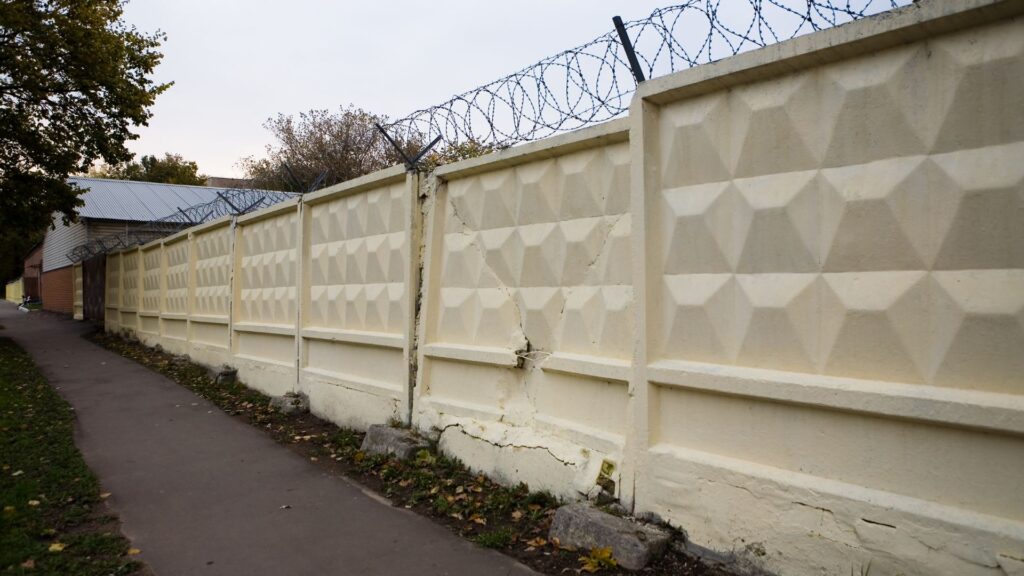
The best colour to paint concrete fence posts depends on your style and outdoor environment. Neutral tones like gray, beige, or off-white offer a timeless and versatile look, while bold colours such as black or navy blue add modern sophistication. For a natural, garden-friendly vibe, consider forest green or earthy tones like terracotta. Always choose weather-resistant paint and primer to ensure durability and protect the posts from the elements.
- Why Paint Your Concrete Fence Posts?
- Considerations Before Choosing A Color
- Popular Colour Choices For Painting Concrete Fence Posts
- Step-By-Step Guide To Painting Concrete Fence Posts
- Mistakes To Avoid When Painting Concrete Fence Posts
- Maintenance Tips For Painted Concrete Fence Posts
- FAQs: About What Color To Paint Concrete Fence Posts
- Conclusion
Why Paint Your Concrete Fence Posts?
Concrete fence posts are a sturdy and long-lasting choice for many homeowners, but they can sometimes lack aesthetic appeal. Painting your concrete fence posts is an easy and effective way to address this issue while offering additional benefits beyond just appearance. Here’s why you should consider painting your concrete fence posts:
Improved Aesthetics
Concrete, though durable, tends to develop a drab, gray look over time. This can make your outdoor space appear dull and uninspiring. A fresh coat of paint can do wonders in revamping the overall look of your concrete fence posts. Whether you prefer neutral shades or bold, vibrant colors, painting can instantly transform your yard, making it look more modern, welcoming, and polished.
Especially for older concrete posts that may show signs of wear and tear, paint acts as a refresh that can hide imperfections such as fading or discoloration. By choosing the right color, you can seamlessly blend your concrete fence posts into your landscaping, giving your property a cohesive, attractive appearance.
Protection
Concrete is a resilient material, but exposure to the elements can still take its toll over time. Harsh sunlight, rain, and temperature fluctuations can cause the surface of your concrete fence posts to crack, weather, or erode. By adding a protective layer of paint, you create a barrier that helps to shield the concrete from these environmental stresses.
High-quality exterior paints are designed to be water-resistant and UV-resistant, which means they not only protect your concrete from moisture but also from fading due to prolonged sun exposure. This protective layer extends the lifespan of your fence posts, ensuring that they remain sturdy and attractive for years to come.
Cost-Effective Update
Replacing concrete fence posts can be an expensive and labor-intensive project. Fortunately, painting offers a much more affordable alternative that still delivers impressive results. Instead of dealing with the hassle and expense of replacing worn or outdated posts, a coat of paint can give them a brand-new look at a fraction of the cost.
With minimal investment in paint and a bit of time, you can achieve a professional finish that significantly enhances the overall appearance of your outdoor area. For homeowners looking to update their yard on a budget, painting concrete fence posts is a smart and economical choice.
Customization
Painting your concrete fence posts also offers an opportunity for creativity and personalization. You can choose colors that match or complement other elements of your outdoor space, such as your fence, patio, or even the exterior of your home. Whether you prefer classic white, earthy tones, or something more adventurous like a bright pop of color, painting allows you to customize your posts to suit your style.
If you want your outdoor area to reflect your personality or coordinate with a specific design theme, painting your concrete fence posts gives you the flexibility to do so. You can even use patterns, textures, or stenciling techniques to add further interest and uniqueness.
In conclusion, painting your concrete fence posts is a simple, effective way to boost your outdoor space’s appearance while adding protection, longevity, and customization. It’s an affordable home improvement project that can drastically change the look and feel of your yard. Whether you’re looking to refresh old, weathered posts or just want to add a personal touch to your space, painting is a practical solution that enhances both form and function.

Considerations Before Choosing A Color
When it comes to selecting the perfect colour for any outdoor space, there are several key factors you should carefully consider. These elements can influence the overall look, feel, and even the functionality of your environment. Let’s break down the top considerations that can guide you in making the best choice.
1. Surrounding Environment
The first thing to think about is how your colour choice will interact with the existing elements in your outdoor space. This includes structures like fences, decking, and even your home’s exterior. Harmonizing your paint or furniture colours with the surrounding features can create a cohesive and visually appealing design.
For example, if your house has a natural brick exterior or wooden fencing, you might want to opt for earth tones that blend well with these features. On the other hand, contrasting colours can make certain features pop. Bright hues can be used to highlight particular areas, like a patio or seating area, making them focal points of the space.
Additionally, consider the natural landscape around you. Are there lush green plants, flower beds bursting with colour, or perhaps a more minimalist, dry landscape? The colours you choose should complement the greenery or blend in with the natural surroundings to create balance. For instance, earthy tones like beige or olive can seamlessly integrate with a garden, while bold colours like red or orange could serve as striking contrasts to a simple lawn.
2. Climate and Weather
Climate plays a significant role in determining the durability and aesthetic appeal of your colour choices. Depending on whether you live in a hot or cold climate, the way colours perform over time can vary drastically.
In hotter climates, lighter colours can reflect sunlight and prevent surfaces from absorbing excessive heat. This not only helps in keeping outdoor spaces cooler but also prevents colours from fading too quickly due to constant sun exposure. Lighter shades, like pastels or whites, can maintain their vibrancy for longer periods in sunny areas. Conversely, darker colours might absorb more heat and can fade faster in such conditions, especially if exposed to direct sunlight.
If you reside in a cooler or more temperate climate, darker colours might be more suitable. They can absorb and retain heat, which can be a functional choice for cooler evenings. However, keep in mind that certain colours might wear differently depending on exposure to moisture, wind, and other weather elements. Dark blues, grays, or even deep greens can look stunning but might need more frequent maintenance if exposed to harsh weather conditions.
3. Style and Theme of Your Home
Another essential factor is the overall style and theme of your home. The architectural style of your house should align with your colour choices to create a unified look.
For traditional homes, classic colours like soft whites, warm neutrals, or deep earthy tones tend to work well. These shades have a timeless appeal and can complement the intricate details and craftsmanship often found in traditional architecture. On the other hand, if you have a modern or contemporary home, bolder, sleeker colours like charcoal, black, or even vibrant, trend-setting hues may be the better choice. Modern homes often feature clean lines and minimalistic designs, which can pair beautifully with more daring colour selections.
Another aspect to consider is whether you prefer staying with current trends or opting for timeless, classic colours. Trendy colours might make a statement today but could feel outdated in a few years. Classic neutrals, however, tend to withstand changing styles and offer longevity.
4. Personal Preference and Mood
Lastly, but perhaps most importantly, is your personal preference and the mood you wish to create in your space. Colour has a profound impact on mood and emotion, so it’s crucial to select shades that reflect the atmosphere you want to cultivate.
Different colours evoke different feelings. For instance, greens are known for their calming, tranquil effects, making them ideal for peaceful garden areas. Blues, especially lighter shades, also promote a sense of calm and can make spaces feel serene. Neutral tones like beige, gray, and off-white can bring sophistication and versatility, while also serving as a perfect backdrop for colorful accents.
Consider popular colours for outdoor spaces and how they might influence the overall mood. Soft blues and greens can make a space feel like a peaceful retreat, while warmer tones like terracotta, yellow, or muted reds can bring warmth and energy to the area. Ultimately, your personal taste should be the guiding force behind your decision, ensuring that the space feels uniquely yours.
Final Thoughts
Choosing the right colour for your outdoor environment is not just about aesthetics but also about how the space functions and feels. By taking into account factors like the surrounding environment, climate, the architectural style of your home, and your personal mood preferences, you can make an informed decision that enhances both the beauty and comfort of your outdoor living space. Always aim for a balance between practicality and style, ensuring that your chosen colours will not only look great today but also stand the test of time.

Popular Colour Choices For Painting Concrete Fence Posts
When it comes to enhancing the look of your outdoor space, painting concrete fence posts is a simple yet effective way to add personality and style. By choosing the right color, you can completely transform the aesthetic of your yard or garden, making it more cohesive with your home’s exterior design. In this guide, we’ll explore some popular color choices that can suit different outdoor styles, from neutral tones to bold statements, and even textured finishes.
1. Neutral Tones
Neutral tones are timeless and versatile, offering a polished, clean look that complements various outdoor design styles. These tones are perfect for homeowners looking to achieve a balanced and understated appearance.
- Gray: A sleek, modern choice that brings sophistication to your outdoor area. Gray works particularly well in industrial or minimalist settings, seamlessly blending into the background while enhancing other elements like plants or furniture. Its neutral nature also makes it easy to pair with different color schemes, offering flexibility in your landscape design.
- Beige or Taupe: If you’re aiming for a softer, more natural look, beige or taupe are excellent options. These earthy tones blend beautifully into garden spaces, giving a relaxed, rustic feel. Whether you’re designing a cottage-style yard or simply want a warm, understated color, beige and taupe are great for creating an inviting, harmonious outdoor environment.
- Off-White or Cream: Light, bright, and clean, off-white or cream can make smaller spaces feel larger and more open. These shades reflect heat, which can be beneficial in sunny climates, keeping the area cooler. For a crisp, airy feel, off-white or cream-painted fence posts can elevate the overall brightness of your yard, making it feel fresh and well-maintained.
2. Bold Colours
For homeowners looking to make a statement, bold colors offer a way to create striking contrasts and eye-catching visuals. These colors can dramatically enhance the ambiance of your outdoor space.
- Black: There’s no denying the elegance of black. This bold and striking color adds a modern, sophisticated touch to any garden. Black posts can create a powerful contrast against green foliage or vibrant flowers, making the natural elements of your yard stand out even more. It’s perfect for those who want a clean, high-contrast design that exudes luxury.
- Navy Blue: Deep, rich navy blue adds a chic, coastal vibe to your outdoor space. It works well in gardens that aim for a maritime or nautical theme. Navy blue pairs beautifully with white or neutral elements, creating a striking, polished look that feels timeless yet bold.
- Forest Green: For those who prefer a more organic feel, forest green is an ideal color choice. This shade blends seamlessly with the natural landscape, creating a calming, peaceful environment. It’s perfect for outdoor spaces with lots of greenery, as the fence posts will integrate smoothly into the surroundings without drawing too much attention.
3. Fun and Vibrant Options
For those who want to add a splash of personality to their outdoor areas, vibrant colors offer a playful and creative touch. These shades can bring energy and a sense of fun to your yard.
- Terracotta: Warm and earthy, terracotta is a perfect match for Mediterranean-style landscapes or desert-themed spaces. This rich, sun-kissed color complements stone and wooden features, giving your outdoor area a cozy, inviting atmosphere.
- Muted Pastels (Soft Blues, Greens, Pinks): Pastels bring a whimsical and charming feel to your yard. Whether it’s soft blue, green, or pink, these muted tones are playful but not overpowering. They can create a light, airy ambiance, perfect for a garden space that feels welcoming and imaginative.
- Bright Accent Colours (Yellow, Orange, Red): When used sparingly, bright colors like yellow, orange, or red can turn your garden into a lively, artistic space. These bold accent colors are excellent for drawing attention to specific areas, such as an artistic focal point or a garden feature you want to highlight. Just be careful not to overdo it, as too much brightness can become overwhelming.
4. Weathered and Textured Effects
For a more unique and natural look, consider weathered or textured paint effects. These styles add character and depth to your concrete fence posts, offering a rustic, vintage feel.
- Stone or Concrete Effect: If you want your fence posts to have a raw, natural appearance, consider paints that mimic the look of stone or concrete. These textured finishes provide a rugged, earthy feel that pairs well with natural landscaping elements, such as rock gardens or gravel paths.
- Distressed or Aged Patina: For those who appreciate vintage aesthetics, distressed or aged patina techniques can give your fence posts a weathered, time-worn look. This style adds depth and history to your outdoor space, creating a feeling of rustic charm and nostalgia. It works particularly well in gardens that feature antique or shabby chic décor.
Selecting the right color for your concrete fence posts can make a significant impact on the overall look and feel of your outdoor space. Whether you prefer neutral tones that blend seamlessly into the environment or bold colors that make a statement, there’s a wide range of options to suit your personal style and garden design. From fun and vibrant colors to textured and weathered effects, your choice of color can help enhance the beauty of your outdoor space, creating a cohesive and visually appealing landscape.
Step-By-Step Guide To Painting Concrete Fence Posts
Painting concrete fence posts can significantly enhance your outdoor space by giving your fence a fresh, appealing look. To ensure a durable, professional-looking finish that stands up to the elements, it’s essential to follow a methodical approach. Below is a step-by-step guide that walks you through the entire process of painting concrete fence posts, from preparation to optional sealing.
1. Gather Your Materials
Before starting the painting process, make sure you have all the necessary materials. Having everything ready will save you time and prevent unnecessary interruptions. Here’s a list of items you’ll need:
- Concrete Primer: This is essential for ensuring that the paint adheres to the rough surface of the concrete.
- Weather-Resistant Paint: Opt for a durable, outdoor-specific paint that can withstand harsh weather and UV exposure.
- Brushes and Rollers: Use brushes for detailed or small areas, and rollers for larger sections of the post.
- Painter’s Tape: Protect any areas you don’t want to paint, like nearby surfaces or the ground.
- Drop Cloths: Lay these down to protect the surrounding area from drips and spills.
2. Clean the Posts
Before you can apply any primer or paint, it’s crucial to ensure the surface is clean. Painting over dirt, grime, or old, peeling paint will lead to poor adhesion and a short-lived finish.
- Why Cleaning is Important: Proper surface preparation ensures a smooth finish and helps the paint bond to the concrete for a long-lasting result. Dirt, dust, and grime can prevent the primer and paint from adhering properly, leading to peeling or chipping down the road.
How to Clean Effectively
- Power Washing: For a deep clean, using a power washer can effectively remove stubborn dirt and old paint. This method is especially useful for large surfaces and rough-textured posts.
- Soap and Scrubbing: In areas where a power washer isn’t feasible, scrub the surface with soap and water. A stiff brush will help remove grime from any crevices.
- Rinse Thoroughly: After cleaning, make sure the posts are thoroughly rinsed and completely dry before moving on to the next step. Moisture can prevent primer and paint from adhering correctly.
3. Apply Primer
Applying a concrete primer is a critical step to ensure that your paint job lasts for years without flaking or chipping.
- Why Primer is Necessary: Concrete is a porous material, which means it can absorb paint unevenly, leading to a patchy or streaky finish. A primer creates a smooth, sealed surface that helps the paint adhere properly and ensures a uniform color across the entire post.
How to Apply Primer
- Use a Roller or Brush: Apply the primer evenly with a roller for larger areas, while using a brush for the edges and detailed spots.
- Let it Dry Fully: Be sure to allow the primer to dry completely before proceeding to the next step. Typically, you’ll need to wait at least 24 hours, depending on the weather and the manufacturer’s instructions.
4. Painting
Once the primer is dry, it’s time to apply the paint. This step can significantly impact the aesthetic of your fence, so it’s worth taking the time to do it right.
- Choosing the Right Paint: Look for weather-resistant, UV-protected, and outdoor-specific paint designed for concrete. These types of paint are formulated to withstand the outdoor elements, including harsh sunlight, rain, and temperature fluctuations.
How to Paint
Application Techniques
- Use brushes to get into smaller areas, corners, and edges for precision.
- For larger areas, use a roller to save time and ensure even coverage.
Avoiding Streaks: To prevent streaks, work in small sections and ensure that the paint is spread evenly. Avoid overloading your brush or roller with too much paint at once.
Multiple Coats for Best Results
- Typically, you will need at least two coats of paint for full coverage. Be sure to wait the recommended drying time between coats, usually around 4-6 hours depending on the paint and weather conditions.
- Applying too many coats too quickly can lead to peeling or bubbling, so patience is key here.
5. Sealing (Optional)
While sealing your painted fence posts is optional, it can add an extra layer of protection and ensure that your paint job looks fresh for longer.
- Why Use a Sealant: Sealing your painted fence posts provides extra durability and helps protect the paint from weather damage, UV rays, and general wear and tear.
How to Apply the Sealant
- Clear Sealant: Use a clear, weatherproof sealant that is designed for outdoor use. This will maintain the color of the paint while providing added protection.
- Application Process: Apply the sealant with a roller or brush, just as you did with the primer and paint. Make sure to apply it evenly to avoid drips or buildup. Let it dry thoroughly before exposing the fence posts to weather or moisture.
Painting concrete fence posts can be a straightforward DIY project that enhances the appearance and longevity of your outdoor space. By following this step-by-step guide and taking the time to properly clean, prime, paint, and (optionally) seal your fence posts, you can achieve a smooth, professional finish that lasts for years. With the right materials and techniques, you’ll transform your fence into a durable, attractive feature in your yard.

Mistakes To Avoid When Painting Concrete Fence Posts
Painting concrete fence posts may seem like a straightforward task, but there are common mistakes that can significantly impact the durability and appearance of your work. Whether you’re trying to enhance your yard’s aesthetics or prolong the life of your fence, avoiding these pitfalls is essential for long-lasting and professional-looking results. Below are key mistakes to steer clear of when painting concrete fence posts:
1. Skipping Primer
One of the biggest errors people make is skipping the primer. Primer serves as the foundation for your paint, helping it adhere better to the rough surface of concrete. Without a primer, the paint is more likely to peel, chip, or wear away over time, particularly when exposed to harsh outdoor elements. Concrete is a porous material, and applying paint directly onto it without a primer leads to poor adhesion and an uneven finish. By using a quality primer designed for masonry or concrete, you create a seal that ensures the paint stays on for much longer, maintaining a smooth and even coat.
2. Using Indoor Paint Outdoors
Another common mistake is using the wrong type of paint, particularly indoor paint, for outdoor projects. While indoor paint may offer a wide range of colors and finishes, it’s not designed to withstand the harsh conditions of the outdoors. Exterior paints are specifically formulated to resist UV rays, rain, wind, and temperature fluctuations, which makes them ideal for projects like painting concrete fence posts. Using indoor paint outdoors can lead to fading, peeling, and cracking, as it lacks the protective components needed to hold up under sun and weather exposure. Always choose a high-quality exterior paint to ensure your fence looks good for years to come.
3. Ignoring Weather Conditions
Weather plays a critical role in the success of your painting project. Many DIYers overlook this factor, leading to unsatisfactory results. Painting when it’s too hot can cause the paint to dry too quickly, resulting in a streaky and uneven finish. Conversely, painting in very cold weather can prevent the paint from curing properly, making it prone to peeling. High humidity can also interfere with paint drying, causing it to stay wet for too long and resulting in a tacky surface that collects dirt. Always check the weather forecast before starting your project and aim to paint on a day with mild, dry conditions for optimal results.
4. Rushing the Job
Rushing through the painting process is another mistake that can ruin the overall finish of your concrete fence posts. Applying thick, uneven coats of paint in a hurry leads to drips, streaks, and areas that may not get full coverage. This not only affects the visual appeal but also reduces the protective qualities of the paint. Taking your time to apply thin, even layers and allowing each coat to dry fully before applying the next is crucial. Patience during the painting process will result in a more durable and polished appearance, ultimately saving you time and effort in the long run.
By avoiding these common mistakes, you’ll ensure that your concrete fence posts have a long-lasting, attractive finish that enhances the look of your outdoor space. Proper preparation, selecting the right materials, and paying attention to detail will go a long way in achieving a professional result.

Maintenance Tips For Painted Concrete Fence Posts
Proper maintenance of your painted concrete fence posts is essential for ensuring their durability and long-lasting appearance. With a few simple upkeep strategies, you can keep your fence posts looking fresh and vibrant for years to come. Here are some detailed tips to help you maintain painted concrete fence posts effectively.
Regular Cleaning
Regular cleaning is crucial to preserving the appearance of your painted fence posts while preventing dirt and grime buildup. Over time, dust, pollutants, and organic materials like moss or mold can accumulate, dulling the paint. However, it’s important to clean the posts without damaging the paintwork. Here’s how to do it:
1. Use a Mild Detergent: Start by mixing a small amount of mild detergent with warm water. Avoid harsh chemicals or abrasive cleaners, as these can strip away the paint or damage the finish.
2. Gentle Scrubbing: Use a soft-bristle brush or sponge to scrub the surface gently. Pay attention to areas with heavy dirt buildup or stains, but be careful not to scrub too hard, which could cause the paint to chip or fade.
3. Rinse with Water: After scrubbing, rinse the posts thoroughly with a garden hose or a bucket of clean water to remove any soap residue. It’s best to avoid high-pressure washers unless you’re confident it won’t strip the paint. High pressure can be too intense and might lead to peeling or cracking in the paint.
4. Dry the Posts: To avoid watermarks or streaking, dry the fence posts using a soft cloth or allow them to air dry in sunny conditions.
By following these steps regularly, at least twice a year, you can ensure that your painted concrete fence posts maintain their vibrant appearance without premature wear.
Touch-Ups
Over time, even the best-quality paint will experience some wear and tear due to exposure to the elements. Small chips, scratches, or fading can occur, especially on fence posts that are subjected to rain, sun, and wind. Regular touch-ups are key to keeping your posts looking fresh and new.
1. Inspect for Damage: Periodically, check your fence posts for any signs of paint damage. Look for peeling, chipping, or fading areas that may need attention.
2. Clean the Area: Before applying new paint, ensure the area is clean and free from debris. Any dirt or grime left on the surface can affect the adhesion of the new paint.
3. Sand Lightly if Necessary: If there are any rough edges or peeling sections, use fine-grit sandpaper to smooth out the surface. This creates an even area for the paint to adhere to, ensuring a flawless finish.
4. Apply Paint Sparingly: Using the same paint type as originally applied, gently cover the affected areas with a brush. Avoid applying too much paint at once; thin, even coats will give the best result. Allow each coat to dry completely before adding another if needed.
Regular touch-ups prevent minor imperfections from turning into larger issues and help extend the life of your fence posts’ painted surfaces.
Resealing
If your painted concrete fence posts were sealed to provide extra protection from moisture and weather, it’s important to reapply the sealant periodically. A sealant adds a layer of defense against water penetration, reducing the risk of cracks, chipping, or fading. Here’s how and when to reseal your posts:
1. Check the Sealant’s Condition: Every 1-2 years, inspect the sealant for signs of wear. If you notice water soaking into the posts rather than beading up on the surface, it’s time to reseal.
2. Clean and Dry the Surface: Before applying a new layer of sealant, make sure the surface is completely clean and dry. Any moisture trapped underneath the sealant can cause bubbling or peeling later on.
3. Choose the Right Sealant: Use a sealant that is compatible with both concrete and painted surfaces. Some sealants are designed specifically for painted concrete and will help preserve both the paint and the concrete underneath.
4. Apply Evenly: Apply the sealant evenly using a brush or roller, making sure to cover the entire surface of the post. Avoid applying too thick a coat, as this can cause the sealant to look cloudy or uneven. Most sealants dry within a few hours, but always follow the manufacturer’s instructions for drying times.
By resealing your posts on a regular basis, you can help protect them from environmental damage, prolong the life of the paint, and ensure your fence posts continue to look their best for years to come.
Taking care of painted concrete fence posts doesn’t have to be a difficult task. With regular cleaning, timely touch-ups, and proper resealing, you can keep your fence posts looking fresh and well-maintained. By incorporating these simple maintenance tips into your routine, you’ll not only enhance the appearance of your property but also extend the life of your concrete fence posts.

FAQs: About What Color To Paint Concrete Fence Posts
Paint on concrete fence posts can last anywhere from 5 to 10 years, depending on the quality of the paint, the weather conditions, and how well the posts were prepared before painting. Regular maintenance, like cleaning and touch-ups, can extend the lifespan of the paint.
The best type of paint for concrete fence posts is exterior-grade masonry or concrete paint. These paints are specially designed to withstand weather conditions, resist chipping, and adhere well to porous surfaces like concrete. Make sure to use a primer before painting to improve adhesion and longevity.
Yes, you can paint over previously painted concrete fence posts. However, it’s essential to clean the surface thoroughly, remove any loose or peeling paint, and apply a fresh coat of primer to ensure the new paint adheres properly.
While not always necessary, sealing the paint with a clear weatherproof sealant can provide additional protection against moisture, UV rays, and fading. A sealant is especially recommended in harsh weather conditions or if you’ve chosen a vibrant or bold colour that’s prone to fading.
To prepare concrete fence posts, start by cleaning them thoroughly with soap, water, and a stiff brush to remove dirt, grime, and any previous coatings. If needed, use a power washer. After cleaning, allow the posts to dry completely before applying a primer designed for masonry or concrete surfaces.
Typically, two coats of paint are recommended for concrete fence posts to achieve even coverage and durability. After the first coat dries, assess the coverage, and apply a second coat for a smooth, uniform finish. Always follow the drying times specified on the paint can for the best results.
Common mistakes include skipping the primer, using indoor paint outdoors, applying paint in poor weather conditions (too hot, too cold, or humid), and rushing the process, which can lead to uneven coats and chipping. Always ensure proper surface preparation and use quality materials for lasting results.
It’s best to avoid painting in extreme weather conditions. For optimal results, paint in moderate temperatures, ideally between 50°F (10°C) and 85°F (29°C). Extreme cold can prevent paint from adhering properly, while excessive heat can cause the paint to dry too quickly, leading to cracks or uneven finishes.
For small yards or gardens, lighter colours like off-white, cream, or light gray can make the space feel more open and larger. If you want a more vibrant touch, consider soft pastels or muted tones, which add personality without overwhelming the space.
To maintain painted concrete fence posts, clean them regularly with a mild detergent and water to remove dirt and debris. If you notice any chips or peeling, touch up the paint as soon as possible to prevent further damage. Resealing the paint every few years can also help extend its lifespan.
Conclusion
In conclusion, choosing the right color and properly painting your concrete fence posts can significantly enhance the overall appearance of your outdoor space. With the knowledge you’ve gained, you’re now ready to pick up that paintbrush and start transforming your yard into a beautiful and cohesive extension of your home. Whether you’re a seasoned DIY enthusiast or just getting started, every step counts in creating the outdoor space of your dreams. Don’t forget to share your own painting projects or tips in the comments below, and if you’re looking for more inspiration, check out other DIY outdoor improvement guides on our blog!
About the Author:
Mike Veail is a recognized digital marketing expert with over 6 years of experience in helping tradespeople and small businesses thrive online. A former quantity surveyor, Mike combines deep industry knowledge with hands-on expertise in SEO and Google Ads. His marketing strategies are tailored to the specific needs of the trades sector, helping businesses increase visibility and generate more leads through proven, ethical methods.
Mike has successfully partnered with numerous companies, establishing a track record of delivering measurable results. His work has been featured across various platforms that showcase his expertise in lead generation and online marketing for the trades sector.
Learn more about Mike's experience and services at https://theleadguy.online or follow him on social media: