In New Zealand, timber retaining walls are a sought-after solution in landscaping due to their robustness, cost-effectiveness, and visual charm. These structures play a pivotal role in stabilizing slopes and combatting soil erosion, contributing significantly to the integrity of outdoor environments. Grasping the fundamental principles is key to the successful implementation of such a project.
The design stage of a timber retaining wall necessitates careful deliberation over several critical aspects, including the dimensions of the wall, the characteristics of the soil it will contain, and the existing drainage facilities. The integrity of the wall’s construction depends heavily on a design that can support the earthen load and manage hydrostatic pressure. Moreover, compliance with the stringent building standards and geological requisites set forth by New Zealand law is essential for the wall’s safety and legality.
The actual construction phase kicks off after a thorough design process. This stage involves the careful selection of appropriate materials and implements, site preparation, and the precise execution of the wall as per the design blueprint. Ensuring efficient drainage is a must to thwart any potential water-related damages that could compromise the wall’s structure. When approached with the correct resources, craftsmanship, and know-how, a timber retaining wall is not only a practical investment for any property but also an attractive one.
Essential Insights
- The integrity of a timber retaining wall hinges on a well-thought-out design capable of resisting the forces of soil and water.
- Adherence to New Zealand’s stringent building codes and geotechnical guidelines is critical for the wall’s safety and legal compliance.
- Employing correct construction practices and installing efficient drainage are pivotal for the longevity and effectiveness of a timber retaining wall.
/table of
Retaining Wall Design Overview
Retaining walls are vital structures that stabilize soil and prevent the downslope movement or erosion of earth. Their use is widespread in both landscaping and construction to create terraces on sloped land, safeguard against erosion, and support vertical or near-vertical grade changes.
Retaining walls must withstand various pressures: active pressure from the soil they’re holding back, lateral loads from the earth’s weight, and any additional surcharge from above such as the weight from vehicles if the wall supports a driveway or the load from a structure built atop the wall.
In designing a retaining wall, several factors must be considered: the nature of the soil, the wall’s dimensions, and the magnitude of pressure it’s expected to resist. New Zealand mandates that walls taller than 1.5 meters, or any wall bearing additional loads like driveways or buildings, must have a building consent.
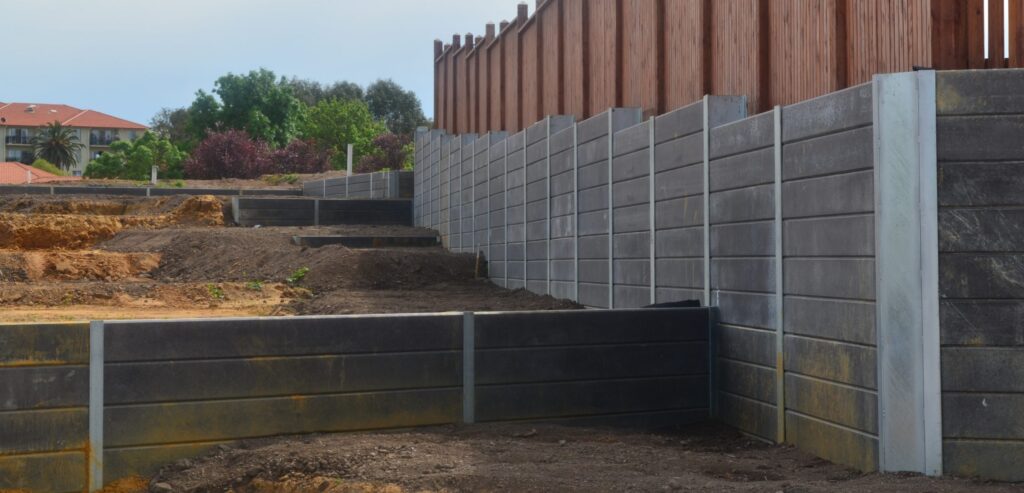
There are several types of retaining walls, each suited to specific scenarios and soil types—such as masonry block cantilevered walls, timber pole walls, and gabion mesh walls. The selection of the wall type depends on the requirements of the project, taking into account soil conditions among other considerations.
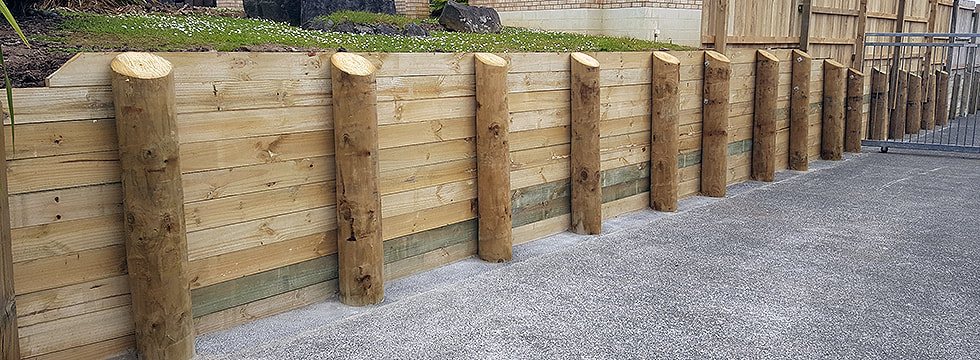
Timber retaining walls are favored in New Zealand for their natural aesthetic and cost-effectiveness. It’s critical that the timber is treated to fend off rot and pests and that the construction ensures stability and durability.
Comprehending the principles of retaining wall design and construction is indispensable for projects necessitating soil retention. By adhering to applicable standards and engaging with seasoned professionals, it’s possible to erect a retaining wall that not only fulfills its intended function but also endures over time.
Design Considerations for Timber Retaining Walls
When planning a timber retaining wall, there are several key design aspects to account for. This includes evaluating the ground level, respecting property boundaries, determining the appropriate wall height, and acknowledging the inherent flexibility of timber construction.
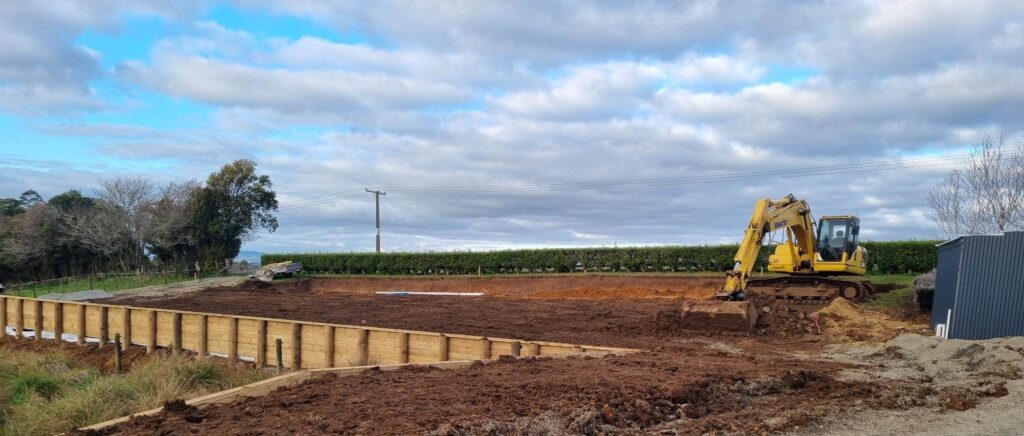
First and foremost, assessing the ground level where the wall will stand is essential. This assessment will influence the choice of the wall design and its height, ensuring that it suits the topography and meets the requirements for a grade change. Timber retaining walls are particularly well-suited for locations with a distinct grade shift on stable ground.
Property boundaries are another vital consideration. The retaining wall must be constructed wholly within the confines of the property it is meant to serve, without imposing on adjacent properties. Confirming property lines and planning the wall accordingly is a step that cannot be overlooked.
The height of the wall plays a pivotal role in its design and legal compliance. In New Zealand, any retaining wall exceeding 1.5 meters in height necessitates a building consent from the local council. The design must be robust enough to withstand the lateral pressure of soil and any additional loads such as vehicles or structures to prevent structural failure.
Lastly, the wall’s flexibility should be taken into account. Timber is a material that can tolerate some movement, allowing the wall to adapt to shifts in the ground level over time. Designing the wall with this flexibility in mind can enhance its longevity and performance.
In conclusion, the design of a timber retaining wall should carefully balance considerations of ground level, property boundaries, wall height, and flexibility. With thoughtful design, a timber retaining wall can be both a functional and attractive feature, safely supporting the earth and additional loads while blending into its natural surroundings.
Constructing a Timber Retaining Wall in New Zealand
The construction of a timber retaining wall in New Zealand is a meticulous process that demands thorough planning and careful execution. Below is a step-by-step guide outlining the critical phases of building a functional and visually pleasing timber retaining wall.
- Preparation and Planning: Initiate the project with a detailed plan, which should encapsulate the wall’s dimensions, timber selection, and site details, including utility lines and other obstacles. Verify the necessity of a building consent for your wall with the local council, especially if it exceeds certain heights or if specific regulations apply.
- Engineering Expertise: For retaining walls above 1.5 meters, consulting with an engineer is compulsory. Their expertise will contribute to a design that is structurally sound, adhering to the New Zealand building codes and ensuring longevity and safety.
- Establishing Footings: The first physical step involves excavating and setting the footings, which form the foundation of the wall. The dimensions and depth must be tailored to the wall’s specifications, and footings should be placed below the frost line to prevent shifting during freeze-thaw cycles.
- Installing the Cantilever Pole: This crucial component is a vertical post that anchors the wall into the footing, providing the primary support structure. It’s vital to set the cantilever pole perfectly upright for the integrity of the retaining wall.
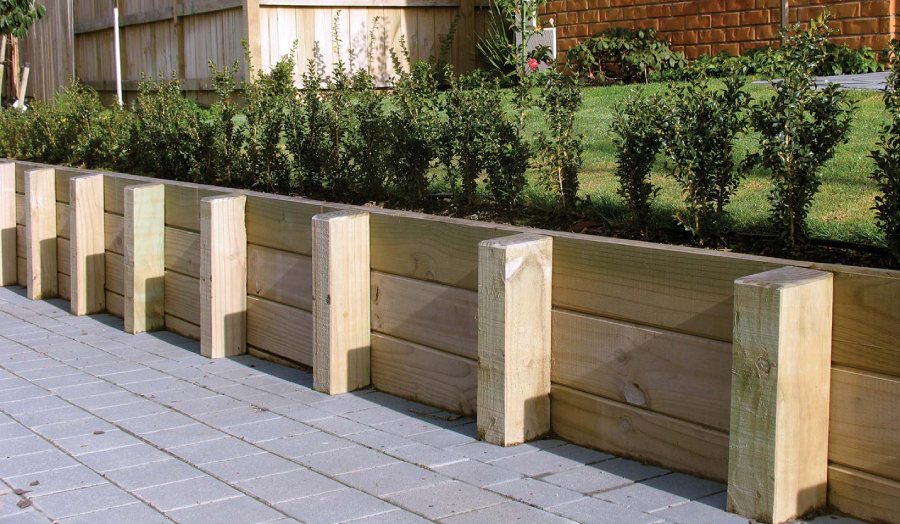
- Constructing the Framework: With poles in place, horizontal timbers are fixed between them to form the wall’s face. The correct placement of these rails, secured with weather-resistant hardware, is essential for distributing the soil pressure evenly.
- Applying Bracing: Stability is reinforced through diagonal bracing, connecting the cantilever poles to the rails. Correctly angled braces enhance the retaining wall’s strength against the lateral pressure of the soil.
- Maintaining Vertical Alignment: Regular checks for plumbness ensure the wall remains vertical during construction. This can be achieved using a plumb bob or a spirit level, and adjustments should be made as necessary.
By meticulously following these steps and seeking professional advice when required, you can build a timber retaining wall that is both sturdy and an attractive addition to your outdoor space. The finished structure will serve its purpose effectively, holding back soil and enhancing the landscape for many years to come.
Incorporating an Effective Drainage System
Adequate drainage is paramount for the longevity and stability of a timber retaining wall in New Zealand. The inclusion of a permeable layer and a properly installed drain coil are vital components of this system. The permeable layer, often made up of gravel or similar material, acts as a filter, allowing water to flow through while preventing soil from clogging the drainage path.
Ensuring that the drain coil directs water away from the wall towards a designated stormwater drain or a garden area that can absorb the moisture is critical. Improper drainage can lead to water accumulation, which increases the hydrostatic pressure on the wall and can cause soil erosion and structural failure.
Professional input is essential to tailor the drainage system to the wall’s design and the site’s unique characteristics, guaranteeing the retaining wall’s performance and compliance with local standards.
Adhering to New Zealand Building Regulations
Building a timber retaining wall in New Zealand mandates adherence to specific regulations, which serve to ensure the structure’s safety and compliance with national standards.
Building consents are required for walls exceeding 1.5 meters in height or those bearing additional loads (surcharge). However, lower walls not under surcharge might be exempt from consent requirements.
The Building Act 2004 and the Building Code are the primary legislative documents governing construction. The Building Code specifies performance standards all construction work must meet and encompasses various aspects of building, including structural stability and durability.
The performance-based nature of the Building Code allows for flexibility in design and construction techniques, provided that the resulting structures meet or exceed the minimum performance standards.
For timber retaining walls, it’s crucial to select timber that is appropriate for the structure’s demands and environmental conditions, as specified by the Building Code. This includes considerations of the timber’s strength, durability, and resistance to decay.
Geotechnical Factors in Design
The geotechnical design of a timber retaining wall considers several critical soil properties, including density and undrained shear strength. Soil behavior, especially in cohesive soils that are prone to expansion and contraction, can significantly affect the wall’s stability.
Designers must account for these soil characteristics to ensure the wall can withstand the lateral earth pressures and any other forces it may encounter.
The New Zealand Geotechnical Society offers guidelines for timber retaining wall design, rooted in standards like the Timber Structures Standard (NZS3603:1993). These guidelines assist in making informed decisions regarding the wall’s design, ensuring it meets the necessary safety and stability standards.
In conclusion, constructing a timber retaining wall in New Zealand requires a comprehensive understanding of drainage requirements, adherence to national building regulations, and geotechnical design considerations. It’s advisable to consult with industry professionals, including engineers and geotechnical experts, to navigate these complex requirements and achieve a successful project outcome.
You’ve highlighted key safety considerations that are critical for the integrity and longevity of a timber retaining wall. Here’s a more detailed approach to each of the points you mentioned:
Structural Engineering Assessment:
- Site Analysis: Before the design process begins, a thorough analysis of the site should be conducted. This includes evaluating soil types, slope gradients, drainage patterns, and any surrounding structures or vegetation that may influence the wall’s stability.
- Design Review: The structural engineering assessment should include a design review that ensures the wall’s specifications are based on accurate load calculations, including the weight of the soil, hydrostatic pressure, live loads, and any surcharges from nearby structures.
Safety Barrier:
- Design Compliance: Safety barriers should comply with New Zealand standards NZS 1170 for structural design actions, which provide guidelines on the loads that safety barriers must be able to resist.
- Material Durability: Select materials for the safety barrier that are durable and weather-resistant to ensure the long-term stability of the safety feature.
Preventing Sliding:
- Adequate Footing: The base of the retaining wall should be designed with a proper footing to resist sliding forces. This often involves extending the base into the slope or using keying to provide additional resistance.
- Reinforcement: Use of tie-back anchors or soil nails can also help in preventing sliding, especially for taller retaining walls or those in softer soils.
Maintenance:
- Inspection Schedule: Set up a regular inspection schedule to identify and rectify any issues promptly. Inspections should be more frequent immediately after heavy rains or seismic events.
- Weep Holes and Drainage Pipes: Check and maintain weep holes and drainage pipes regularly to ensure they are not blocked, as proper drainage is essential to wall performance.
- Vegetation Control: Control vegetation around the wall as roots can affect the soil’s moisture content and physical structure, and branches can impact the wall during strong winds.
Additional Safety Measures:
- Safety Gear: During construction, all workers should use the appropriate safety gear, including hard hats, safety boots, and gloves.
- Public Protection: If the retaining wall is in a public space, temporary barriers or fencing should be erected to keep the public away from the construction area.
- Construction Best Practices: Employ construction best practices such as proper sequencing of work, backfilling in stages, and compacting the backfill material to reduce the risk of sudden soil settlement or wall movement.
- Emergency Plan: Have an emergency response plan in place in case of a failure during construction, including the evacuation of workers and notification of emergency services.
By diligently applying these safety measures and conducting an ongoing review process, the timber retaining wall can be expected to perform its function safely for many years. It’s always best to consult with qualified professionals who are familiar with the latest codes and best practices for retaining wall construction.
Finishing Touches
The final touches on a timber retaining wall not only add to its aesthetic appeal but also contribute to its functionality and longevity. Here are detailed considerations for each final touch you mentioned:
Texture
- Wire Brushing: This technique is ideal for creating a textured, non-slip surface that is visually appealing. It can enhance the wall’s grip, which is particularly useful on sloped landscapes.
- Planning for a Smooth Finish: A smooth finish may be preferred in a more formal or contemporary garden setting. If you plan to seal or paint the timber, a smooth finish will hold the coating better and may result in a more refined appearance.
Batter
- Measurement and Adjustment: Use a level and batter boards to accurately set the batter of the wall. Consistency is key for both aesthetic and structural reasons.
- Visual Check: After setting the batter, step back and look at the wall from different angles to ensure that it appears straight and uniform.
Durability
- Wood Treatment: Selecting the correct level of treatment for the timber is crucial. In New Zealand, H4 level treatment is suitable for ground contact and H5 for poles in the ground, which provides protection against fungal decay and insects.
- Hardware Choice: Galvanized and stainless steel hardware are excellent choices for their resistance to rust. However, it’s important to ensure that the metal used in any fasteners is compatible with the preservative treatment used in the timber to avoid any potential corrosive reactions.
Garden Integration
- Plant Selection: Choose plants that are suitable for the microclimate created by the retaining wall, considering factors such as sun exposure and soil moisture levels.
- Soil Preparation: Behind the wall, ensure that soil is prepared correctly for planting, with appropriate amendments and fertilization to support plant health.
- Irrigation: Consider installing drip irrigation along the retaining wall to provide consistent moisture to the plants, which will help them thrive and reduce maintenance.
Additional Considerations
- Lighting: Adding outdoor lighting can enhance the wall’s appearance at night, highlight plants or features, and improve safety by illuminating walkways.
- Sealing: If desired, apply a sealant to the timber to protect against moisture and UV rays, which can help maintain the wall’s appearance over time.
- Inspection and Access: Ensure that there is easy access for future inspections and maintenance. A retaining wall is a living structure that will change over time and needs to be cared for accordingly.
Remember, these final touches are not just cosmetic. They contribute to the overall success of the wall, integrating it into the landscape, and ensuring its stability and durability. Always consider the specific environmental conditions and the intended use of the garden space when planning these final touches.
Standards for Timber Retaining Walls in New Zealand
In New Zealand, the standards for constructing timber retaining walls are outlined in the New Zealand Building Code (NZBC), particularly clause B1.2, and also in the Ministry of Business, Innovation and Employment (MBIE) guidance. Here is a breakdown of what you need to consider:
- NZ Building Code Clause B1.2: It requires that the structure must withstand loads during its lifetime. This includes permanent loads (such as the weight of the wall itself and the soil it retains) and variable loads (such as water pressure and seismic activity).
- MBIE Section 20: It provides guidance on constructing retaining walls without a building consent, specifying that retaining walls up to 1.5 meters high may not need a consent if they are not supporting a surcharge or any structure (e.g., a building or driveway).
How to Build Timber Retaining Wall in NZ:
- Planning: Determine the height, length, and location of the retaining wall.
- Materials: Select appropriate timber, ensuring it’s treated for ground contact. Commonly, H4 treatment is specified for posts and H5 for poles in direct contact with the ground or water.
- Excavation: Dig holes to the required depth for the posts or poles (at least 900mm below ground for stability).
- Drainage: Install a drainage system behind the wall using geotextile fabric, drain coil, and scoria.
- Construction: Set the posts in concrete, ensuring they are vertical and properly spaced. Fit horizontal timbers (rails or sleepers) between the posts.
- Backfilling: Backfill with gravel or another free-draining material to allow for proper drainage.
Cheapest Way to Build a Retaining Wall in NZ:
- Treated Pine Timber: This is typically the most cost-effective material. However, even with the lower cost, make sure the timber has the appropriate treatment level for ground contact and the correct specifications for the intended use.
Standards for Retaining Walls NZ:
- Loading: The wall must resist the expected loads, including earth pressure, water pressure, and seismic forces.
- Building Distance: As a rule of thumb, the distance from the building to the retaining wall should be at least equal to the height of the retaining wall.
Timber Retaining Wall Specifications:
- Treatment: Minimum of H4 treated timber for ground contact.
- Depth: Posts should be installed with a depth to height ratio that provides stability (usually at least 1/3 of the total length of the pole should be buried).
- Backfill Material: Use a free-draining material like gravel.
- Drainage: Must have a proper drainage system to avoid hydrostatic pressure build-up.
Retaining Wall Post Spacing Calculator:
The post spacing is crucial for the structural integrity of the wall. To calculate the post spacing, you will need:
- Wall Height: The taller the wall, the closer the posts should be.
- Timber Size and Grade: The larger and higher-grade the timber, the further apart the posts can be.
- Soil Type: Denser soils can exert more pressure on the wall, potentially requiring closer post spacing.
- Load Expectations: Walls that support a surcharge or are retaining higher loads may need closer spacing.
There are numerous online calculators that can assist with post spacing for retaining walls, or you can consult with a structural engineer to ensure compliance with NZ standards. Remember, each site has its unique conditions, so it’s essential to design a retaining wall to suit its specific context.
If you need a retaining wall in Nelson, give us a call today.
Retaining Wall FAQS
A building consent is generally required for retaining walls over 1.5 meters in height or for any retaining wall that will carry a surcharge or support a building structure. Walls under 1.5 meters not carrying any additional load may not require consent, but it’s always best to check with your local council for the specific requirements.
The best timber for a retaining wall is one that has been treated to resist moisture and pest damage. In New Zealand, treated pine timber such as H4 and H5 treated logs are commonly used for retaining walls due to their durability and resistance to decay.
The lifespan of a timber retaining wall can vary, but when properly constructed with treated timber and good drainage, it can last up to 20 years or more. Regular maintenance can also extend the life of the wall.
Proper drainage can be achieved by installing a drain coil or agricultural pipe at the base of the wall, covered by a geotextile filter fabric, and then backfilled with a free-draining material such as gravel.
This can vary depending on local council regulations. Generally, it’s advisable to build at least within your property line and consider any local bylaws or resource consent requirements. Always check with your local council for specific guidelines.
Yes, timber retaining walls can be built on sloped ground, but additional considerations for structural support and proper water drainage must be taken into account. It’s advisable to seek professional advice for walls on significantly sloped terrains.
Maintenance may include regular inspections for signs of wood decay, damage, or movement, clearing drainage outlets, and ensuring that the drainage material behind the wall is functioning properly.
The height of your timber retaining wall will depend on various factors including the purpose of the wall, the topography of your site, the type of soil, and local council regulations. Generally, for DIY projects, it is recommended to stay below 1.5 meters, as taller walls require engineering design and a building consent.
H4 treated timber is suitable for ground contact and is used for posts in a retaining wall, whereas H5 treated timber is used for poles in constant contact with the ground or freshwater, providing a higher level of protection against decay and insect attack.
It is possible to install a fence on top of a retaining wall, but this will be considered a surcharge and may affect the design and consent requirements of the wall. Professional advice should be sought to ensure the structure can support the additional load.
About the Author:
Mike Veail is a recognized digital marketing expert with over 6 years of experience in helping tradespeople and small businesses thrive online. A former quantity surveyor, Mike combines deep industry knowledge with hands-on expertise in SEO and Google Ads. His marketing strategies are tailored to the specific needs of the trades sector, helping businesses increase visibility and generate more leads through proven, ethical methods.
Mike has successfully partnered with numerous companies, establishing a track record of delivering measurable results. His work has been featured across various platforms that showcase his expertise in lead generation and online marketing for the trades sector.
Learn more about Mike's experience and services at https://theleadguy.online or follow him on social media: